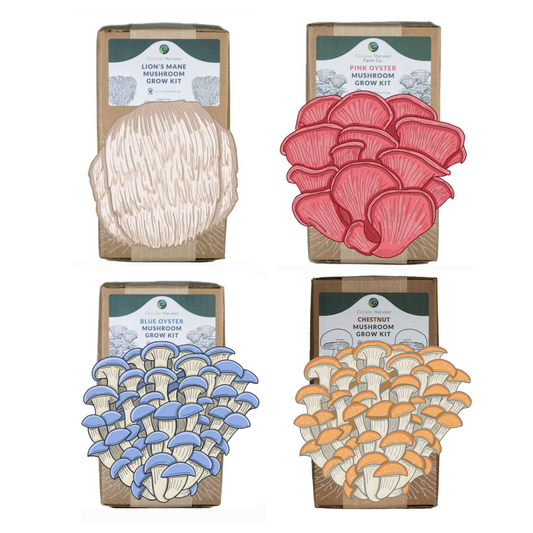
Growing mushrooms at home is a very simple process when using a Circular Harvest mushroom grow kit. With our kits you can grow great mushrooms on your counter top with no additional equipment since your house environment typically suits mushrooms well. However, building a mushroom grow room can be worthwhile to help increase yield sizes, improve taste & visual appeal. This article is for anyone looking to learn how to set up a grow tent and learn a bit more about the fruiting conditions needed for mushroom growing.
Before we get into mushroom growing room designs, we will discuss the growth parameters for each mushroom variety that we sell. The table below can be used as a guide for you to build a perfect growing room. The closer you can get your growing tent set up to these parameters, the happier your mushrooms will be.
Fruiting Conditions:
|
Mushroom Variety |
Temperature (Celsius) |
Humidity (RH) |
CO2 (ppm) |
Fresh Air Exchange (FAE) |
Light (lux) |
|
Lion’s Mane |
18 - 24 |
90-95% |
500-1000 |
5-8 hours |
500-1000 |
|
Blue Oyster |
10 - 21 |
85-90% |
<1000 |
4-8 hours |
1000-1500 |
|
Pink Oyster |
20 – 30 |
85-90% |
<1500 |
5-8 hours |
750-1500 |
|
Golden Oyster |
20 – 28 |
90-95% |
<1000 |
4-8 hours |
500-1000 |
|
King Oyster |
15 – 21 |
85-90% |
<2000 |
4-5 hours |
500-1000 |
|
Elm Oyster |
10 – 21 |
85-90% |
<1000 |
4-8 hours |
500-1000 |
|
Chestnut |
13 - 20 |
90-95% |
500-1000 |
4-8 hours |
500-1000 |
These are the 5 main growth parameters you want to design for when setting up a mushroom growing tent. As you can see, all these mushrooms have an overlapping range on all 5 parameters so you can grow them all in the same mushroom grow tent. If you are only interested in one variety, you should set your environment to those specific conditions.
As a mushroom farmer it is important to pay attention to how your mushrooms are responding to their environment. Each mushroom will grow differently when their needs are not met. For instance, Oyster mushrooms like a lot of fresh air and will grow smaller caps when in a high CO2 environment. Whereas Lion’s Mane is not as picky about CO2 but is fussy about big swings in its temperature and humidity. This knowledge is gained through careful attention to your grow room and experimenting with the different parameters to optimize the environment for your mushrooms. Every mushroom grow room is different since they are in different parts of the world so playing around with higher and lower levels of each parameter is necessary because your outdoor environment will inevitably have some effect on your indoor room grow.
The Evolution of a Mushroom Farmer:
Due to this knowledge gap between beginner and expert mushroom farmer we recommend new growers start slow and evolve organically into a bigger set up as your expertise increases. Almost all farmers start with a mushroom grow kit for their first grow. This allows them to learn the basics. It is the easiest way to grow mushrooms and understand the growth cycle of that specific mushroom variety. It is also a low-cost way to learn about how the mushrooms respond to different conditions. Since you grow them on your counter and can get multiple growths off one block, you can place it in different environmental conditions each time to learn what works best. Building a mini fruiting chamber is a great way to experiment before making a bigger investment.
Once you have grown on your counter a couple of times with a grow kit or in a mini fruiting chamber, the next stage in the mushroom farmer evolution is to build a small mushroom grow room. Typically, people will get a small mushroom greenhouse (also known as a Martha tent). These mini greenhouses come in a variety of sizes so you can find one that fits your space. These tents are great since they are cheap and come with the waterproof outer shell and the racking system to hold your mushroom blocks. The size you buy should be dependent on your space and desired number of mushrooms. You can typically fit 1 grow block in 1 sqft of space.
This method can be as low tech as you would like it to be where you just place your mushroom blocks in the tent to help hold in humidity when you mist them and then fan the room as required (at least 2 times a day). However, this typically still leads to imperfect mushroom growth due to the lack of control over the growing environment. Most people who get this far in their journey invest a bit more money to be able to control airflow and humidity automatically. By investing in a fan, a fogger and some other small materials you can start to dial in your environment to meet specific parameters without having to manually do it.
The Mushroom Grow Room Set Up
Equipment:
- Martha Tent
- Exhaust Fan
- Humidifier or Build your own using our Guide (Blog)
- Humidity controller (only necessary if automation is the goal)
- Timers (if not using a controller)
- A drip tray (for under the tent to collect water)
- Flexible Ducting or Filter to collect spores.
- Piece of foam board insulation to place in the window (If ducting outside)
Steps:
1. Planning
The first step is to plan out your mushroom grow room. You will want to decide;
- Where you will be growing
- What volume of mushrooms you want to grow
- How much equipment you want to use/design of the grow tent set up
Where You Will Grow
Deciding where you will grow is important because you want to consider what the space already has to offer to help support your mushroom growing. Things to consider; Is it a climate controlled room? How is the lighting? Is there a window for exhaust? What if there is a water leak, will the floor be damaged? Is it a dirty room which could increase contamination?
Ideally, when you ask yourself these questions you want a room that is already climate controlled so your temperatures don’t fluctuate and there is lighting so you don’t need to invest in more equipment. We also recommend using a space with a window so you can vent your room outdoors and not have to worry about humidity and spores in the house. Also, a room where the floor can handle a water spill is ideal because it is likely that some point in time there will be a water spill so having a floor where that won’t be a big deal makes it easy to clean and less of a risk to damaging your home.
What Volume of Mushrooms Will You Grow?
Asking yourself this questions allows you to decide what size of tent or space you need to grow. As mentioned earlier, one 4-6 lbs grow block typically takes about 1 sqft of shelf space. Our grow blocks typically yield about 1-2 lbs of mushrooms on the first harvest but that can vary depending on your supplier. Knowing how many mushrooms you want on a weekly basis allows you to plan for how many blocks you will need in the tent at any given moment. Again, people grow for different reasons so just pick a size of room that will support your needs.
The Grow Room Design
Now that you know where you will grow and how much you want to grow you can decide on the design of your space. Here is where you will decide what equipment you want and how automated you want the system to be.
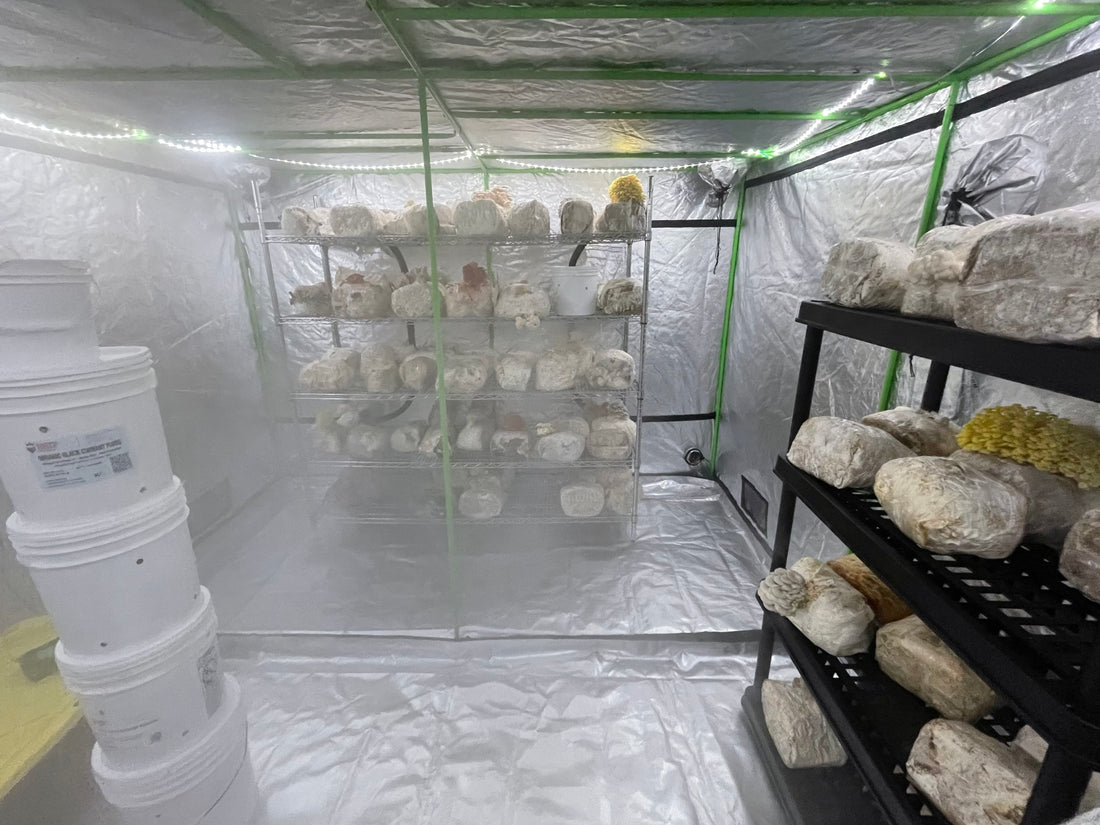
The picture below shows an easy and effective set up that we recommend. All you will need is a fan, humidifier, a bit of air ducting, humidity controller and a drip tray. There are other designs that blow air into the tent or have the humidifier outside the tent. However, we find this method works well for in a house because it is minimal equipment and ensure all humidity & spores leave the house.

The main considerations you want to take into account with your design is how you are going to control the 5 growth parameters mentioned earlier. With this design we have displayed, the fan will suck the humidity from the humidifier, across the whole tent and then out of the tent. This keeps a consistent humidity level and air flow. Additionally, having the equipment hooked up to a controller allows for the humidifier to turn off and on to keep the climate at the right level.
2. Ordering Equipment
Now that you have your design finalized it’s time to order the equipment you need. If you decide to use the design we displayed above you can use this list to source all your equipment.
Equipment:
- Martha Tent
- Exhaust Fan
- Humidifier or Build your own using our Guide (Blog)
- Humidity controller (only necessary if automation is the goal)
- Timers (if not using a controller)
- A drip tray (for under the tent to collect water)
- Flexible Ducting or Filter to collect spores.
- Piece of foam board insulation to place in the window (If ducting outside)
3. Building the Grow Room
Now that you have your equipment, it’s time to start building your mushroom grow tent. You will want to start by assembling the green house by following the manufactures instructions. Once you have the greenhouse assembled, place the humidifier in a bottom corner of the tent and connect it to the humidity controller by following the instructions. Now you will want to install the exhaust fan. Cut a hole in the plastic at the top of the tent on the opposite corner as the humidifier. This allows for the fog to be dragged across the room ensuring full coverage. Now, cut the hole to size for the fan or the ducting. Our recommendation is to place the fan in the tent on the top shelf with the exhaust end pointing out the hole. Then you can us a single piece of ducting to go from the tent to the window. Once you have the fan installed, attach the ducting to the piece of foam board that will be placed in the window. The board should be cut to the dimensions of the window gap so minimal outside air comes in. You will then cut a hole in the foam board so the ducting can be pulled through and exhaust outside. Now that it is all set up, plug the fan into the timer and set the timer so it turns on every 15mins for 15mins. This will give you ample airflow for your mushrooms.
Steps Overview:
- Assemble Tent on top of drip tray
- Place humidifier (in bottom corner of tent) and connect to humidity controller (outside tent)
- Set controller to max 90% min 80% (tweak as needed)
- Instal exhaust fan into tent
- Cut hole
- Place fan or ducting in hole
- Place fan on shelf in the tent with exhaust end poking through hole.
- Add filter to exhaust end or duct outside
- If not exhausting outside, fasten a filter sheet to the exhaust to collect spores using a metal strap or zap straps
- If venting outside, connect ducting from exhaust to foam board and place in window
- Tape seams around holes to ensure they are airtight
- Plug in fan & humidity controller
- Monitor the environment to ensure it is turning off and on when you want.
- Place your fruiting blocks in your tent.
We encourage to exhaust outside if possible, to reduce any chance of humidity causing mold in the home and spores spreading in your house.
Now a Martha tent set up is perfect for most hobby growing needs. It will produce more than enough mushrooms for one family to eat them regularly. If you are someone who has really fallen in love with mushroom growing and think starting your own mushroom business is of interest, the next stage is commercial mushroom farming. If you are interested in learning more about taking the next steps check out our other blog (Link Blog)